There have been some pretty major email security changes lately, initiated by Google and Yahoo and helping protect emails from spam. These email changes primarily affect us business owners who send emails in bulk from various platforms such as Mailerlite, ActiveCampaign, Mailchimp etc.

What are the email security changes?
Personal Email Addresses
First of all, if you are are using a personal email address to send emails for your business, you will now be prevented from doing so, especially if it’s a gmail or yahoo address. This is because personal emails don’t have the same security settings that business domain emails have. So, if you are currently using a personal email you will need to set up and purchase a domain email, with your website address on the end (so mine is hello@wonderfulworldofwebsites.com). You can do this through your hosting provider or by paying for an email address through Google or Microsoft.
Set Up Records to Your Hosting
Next up you will need to add some record to your hosting to increase the deliverability of your email.
Depending on which email platform you use there will be various records for you to set up. These are most likely to be:
SPF (Sender Policy Framework):
SPF is a record that states the servers you are using to send emails. So, for example, as I have Gsuite and ActiveCampaign, then my record would include code from each of those servers.
DKIM (DomainKeys Identified Mail):
DKM creates you a private signature so that your email address can’t be spoofed and used by someone else pretending to be you. A bit like secret digital signature.
DMARC (Domain-based Message Authentication Reporting and Conformance) checks the results of these records and then states what to do with the emails, to let the recipient recieve them or to mark them as spam.
Now, you don’t really need to know what any of this means (although some people like to understand!) but what you do need to know is what exact records you need, where you need to add them and how you do that.
Step 1
So first things first, let’s make these email security changes. Sign into your mailing list platform and you will most likely see a notification that you need to authorise your domains, if you don’t see that then go to your account settings and the info will be under domains or advanced settings (depending on what you use).
You will then need to click to authorise your domain and then it will give you the records to add to your hosting (some may just give you the records without having to click authorise).

Step 2
So where is your hosting? Your hosting is wherever your website/email DNS is (not necessarily where you purchased your domain). Hosting is where your website files are kept and/or where you purchased your email address from. So for example if you are using WordPress then it could be Siteground, Godaddy, 20i, 123 Reg etc. You would usually be paying a yearly or monthly amount to keep your website and emails running. If you don’t have a website just an email address your DNS records will be at your domain. If you have a Wix or Squarespace website and the domain is also with them that’s where the records will be.
Once you are logged into your hosting you will need to access your DNS settings or records. If not called DNS settings it could say DNS Zone Editor or Manage DNS – it would differ depending on where your hosting is. If you are unsure then just Google your hosting company and DNS records so for example ‘how to access godaddy DNS records’
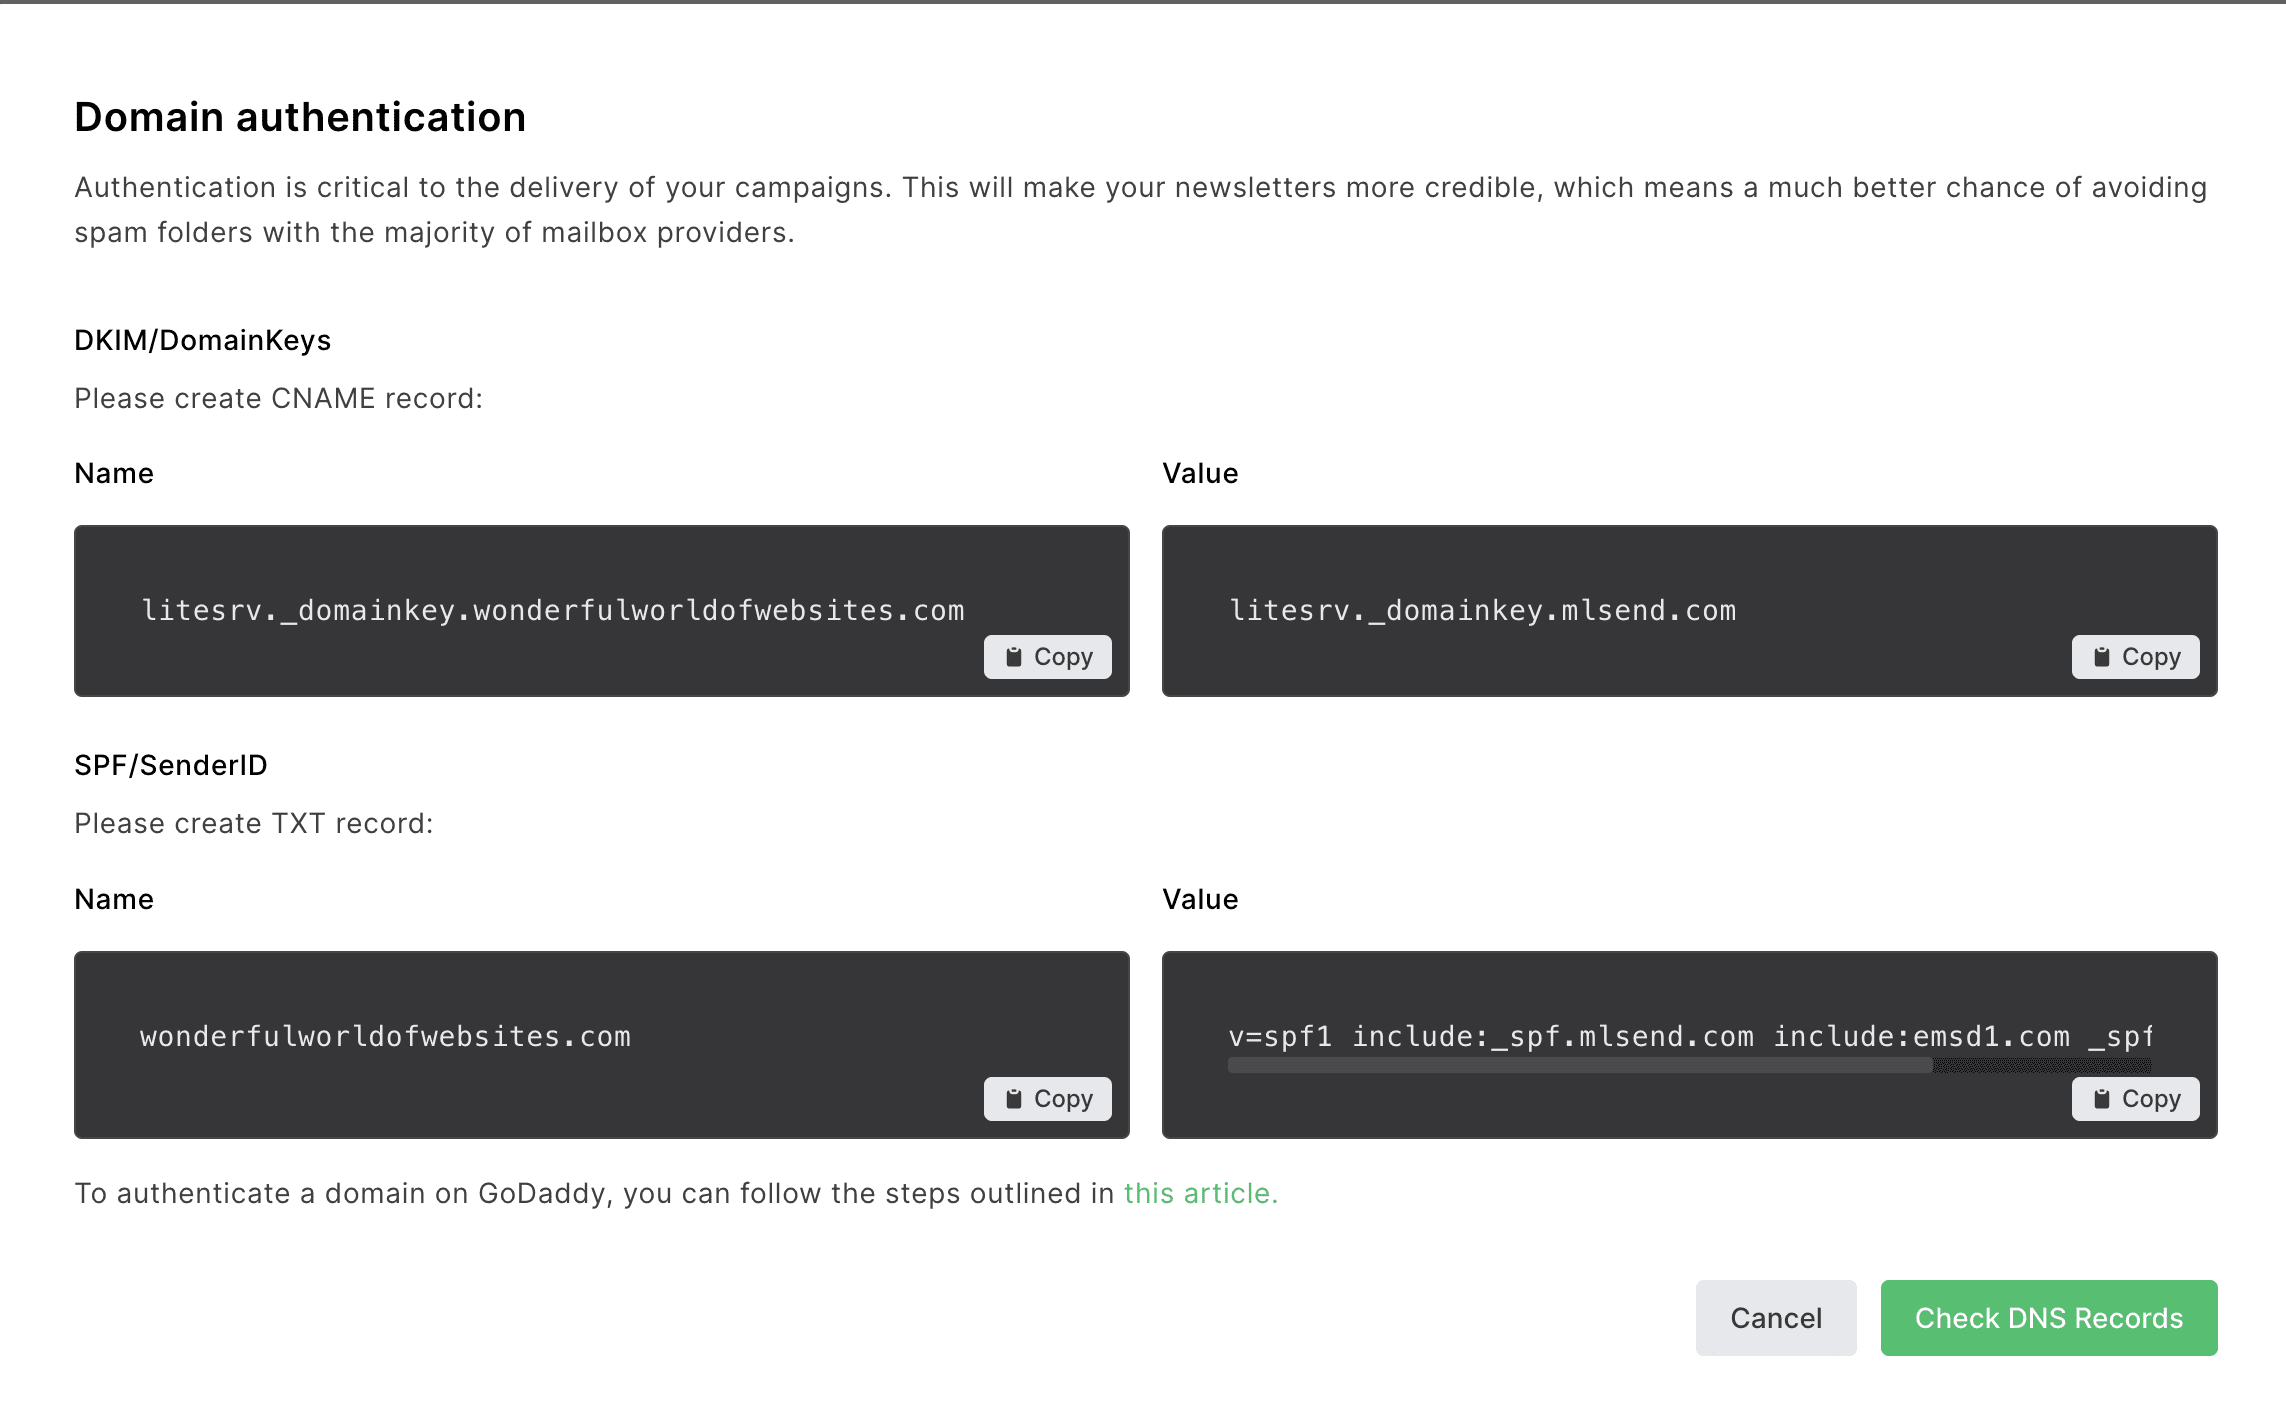
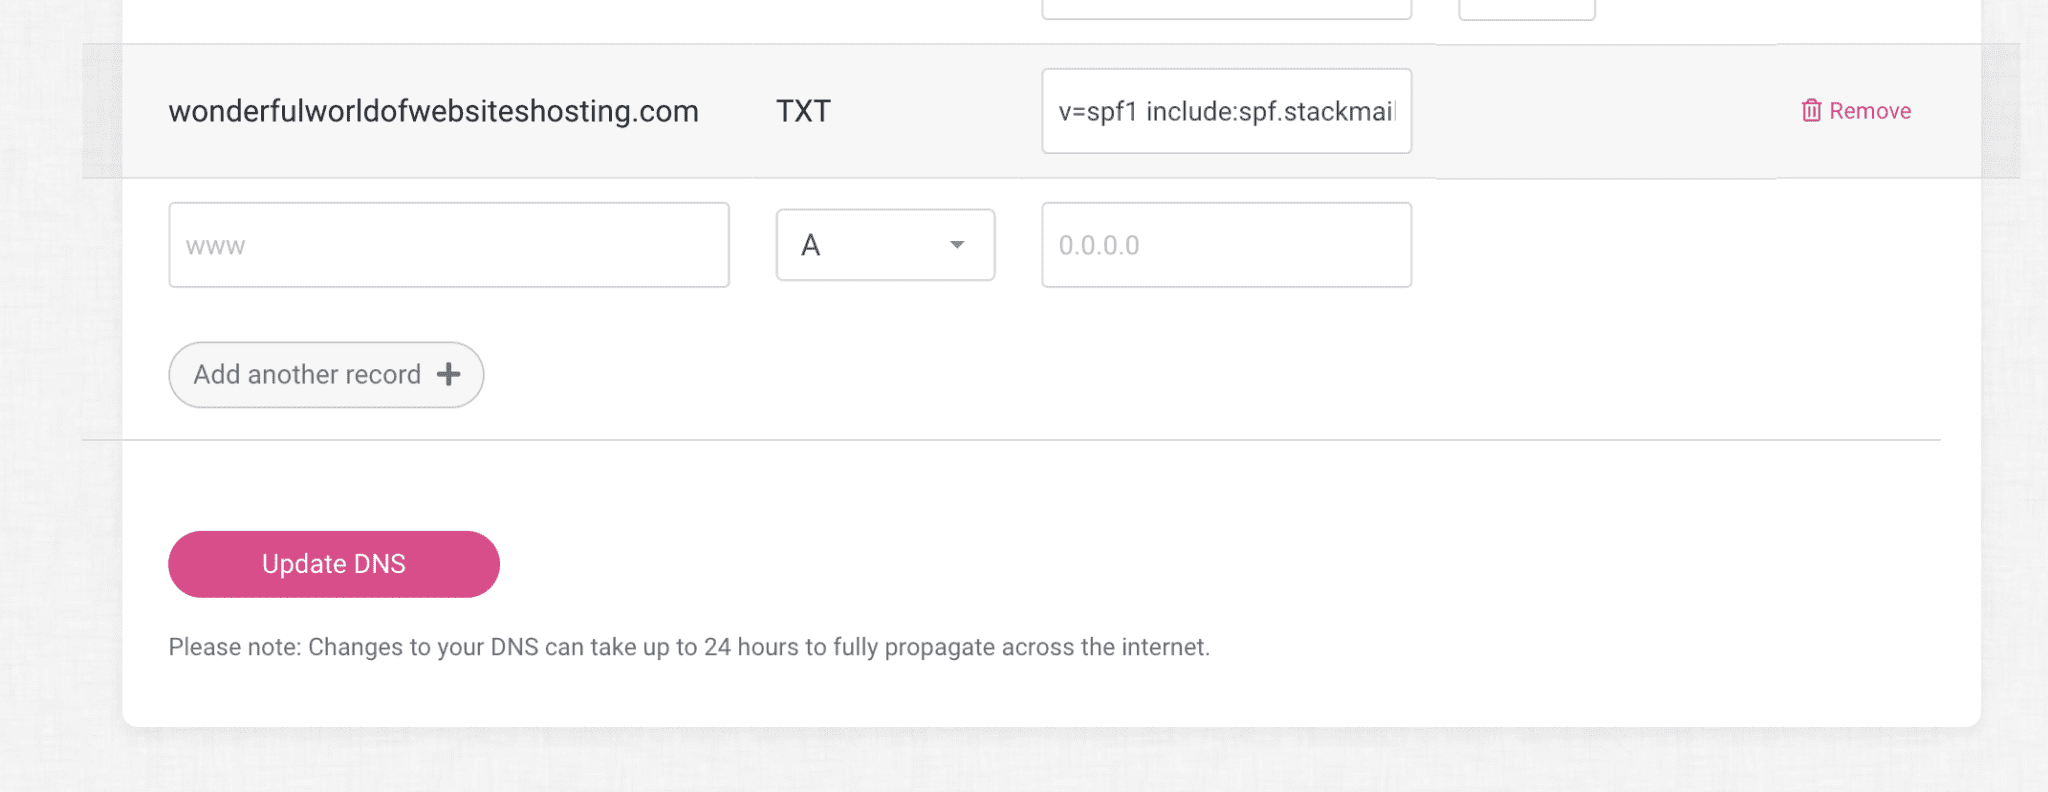
You will then see something similar to below:

Now all you need to do is copy and paste the records into the boxes and then once done verify in your email platform.
So using the Mailerlite example above, we need to first add a CNAME record, so in the dropdown selct CNAME. Then you would copy the first record and paste it in the first box and then copy the second record and paste it in the second box.
Email Security Changes – You Are All Done!
Once verified you are all done! But please note that sometimes DNS records take a while to update, depending on your host, and verification may not be instant. If you still cannot verify after 24 hours then go back and check the records to make sure they are correct.
Also you shouldn’t have two SPF records and many hosts already have one in your DNS settings so this field usually needs to be edited rather than a new record added (copy and paste the second box and replace the current second box in the hosting that has an SPF record.)
Now I think a big congratulations is in order (or a large glass of wine!) as you have successfully completed your email security changes.
If you are still stuck we solve tricky tech problems like this every week over in The Tech Tavern, my monthly tech support group where we have Tech Top Up calls each week, masterclasses, guest experts and a chance to ask questions in the group (if you can’t make the weekly Q&A calls).
You can join below and get your first month free!


